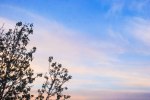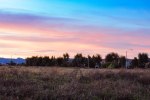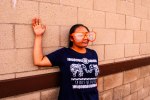


Last week during the Digital Photo Sketchbook course, we went out to take some outdoor portraits. After we took our outdoor portraits as we began to edit them, we were told to show the class some of the photos we came up with so far. I was amazed by a couple of photos that were done by a couple of my classmates and those photos urged me to edit my own photos into really neat portraits as well. So, I continued to experiment with Photoshop by trying out some more adjustments the latest version has to offer. I also used the adjustments and features from Lightroom and Color Efex Pro to edit at least some of my portraits from the series. Out of the three programs I mainly used to edit not just these portraits, but pretty much all the photos I took throughout this course, I feel that Photoshop gives me the most freedom and control on how I want to adjust my photos. The reason is that Photoshop contains plenty of adjustments to work with, the ability to use multiple layers to apply those adjustments, and the option to use layer masks that give me plenty of control on how and where I would like to make those adjustments. I also got to try out the HDR adjustment in Lightroom and see what it can do. When I tried this adjustment on one of my outdoor portraits (which is the seventh photo of the portraits featured in this blog), I took a copy I adjusted in Photoshop along with another copy or two without those adjustments and the result was that the photo ended up looking like a painting. I think that I would like to keep trying out the HDR adjustment and I would love to continue to work with Lightroom, Photoshop and at least work with Color Efex Pro from the Google Nik collection to make adjustments to my future photos. Whether I use one or two or all of the three programs would depend on which photo I feel works best with which one.